What Food to Bring on the John Muir Trail
*Some links here are part of the Amazon Services LLC Associates Program, which helps fund this site. All products listed here are my top recommendations regardless of where you get them.
Packing food for the John Muir Trail doesn’t have to be difficult, but for many it can seem like a daunting task. The southern portion from Muir Trail Ranch to Whitney Portal is 115 miles, and there is no easy resupply along this section.
This means either hiking out to Onion Valley and hitchhiking into town for a resupply and hitching back, or figuring out how to carry enough food for 115 miles. I have always chosen the latter (and simpler) option, picking up my only resupply at Muir Trail Ranch. This means squeezing 10 days worth of food into a bear can. Here’s how I do it.
Figure out how many days you will be hiking and plan out all of your meals for each of them. Most people instinctively plan on having three meals per day, but I’ve discovered that having several snacks throughout the day instead of lunch gives me more consistent energy while saving time and effort.
There’s no need to stop and bust out your camp stove at noon when pre-cooked food is available, especially when you factor in that you will need to pack 2-3 times as much fuel if you do this. I individually pack a breakfast, dinner, and several snacks for each day I anticipate to be on the trail, and I stack them sequentially in layers inside my bear can so I don’t have to empty it every time I want to eat.
TIP: Bring an extra day’s worth of food if you can, or at least a few extra Clif Bars. This gives you a cushion in case something happens or you hike slower than anticipated.
In an ideal world, you will be eating 4,000-5,000 calories and 150-200g of protein each day on the trail, but that just isn’t a reality for most of us. I start off with minimal portions in each Ziploc baggie, pack it all in my bear can, and slowly add more to each meal until the can is full. I typically end up with about 2-2.5lbs of food and 3,000 calories per day with about 100-150g of protein.
Calorie dense, compact, low-moisture foods are what you want. Fortunately, most foods that fit this description are pretty tasty (think of Nutella, peanut butter, almonds, etc). Do plan on having a balanced diet though, and don’t try to subsist solely on something like trailmix or nuts.
Fats and carbs are terrific daytime foods—fats give you sustained energy, and carbs give you immediate energy. Don’t skimp on protein though! Too many hikers focus on carbs and don’t give their muscles the protein they need to recover when they’re sleeping. High-protein dinners and supplemental protein will have you feeling better the next day than cous-cous or rice.
TIP: Bring multivitamins and protein powder to supplement a diet lacking in diversity.
A hot meal can be a real morale booster, especially at the end of the day. It also requires more time and fuel (i.e. weight and space) than food that does not require cooking. One of the best ways to streamline your meals is to pack food that does not require heat, at least for breakfast and lunch. A compromise is to practice what is known as cold-cooking, where you just add cold water and allow the food to reconstitute itself as you hike. This works great for precooked dehydrated meals.
Modern packaging is designed to make food look appealing and extend its shelf life. It’s also bulky and usually full of air or nitrogen to preserve freshness. You can poke the packaging with a needle, squeeze out the air, and put a piece of tape over the hole to make it smaller, but often the material itself is just too stiff to be crammed inside a bear can effectively.
In these instances, I take the food out of the package, put it inside a Ziploc bag, and if it’s particularly perishable, I throw in a tiny desiccant packet. If you do this with a freeze-dried dinner with instructions for in-the-bag cooking, all you need to do is pour the food into the boiling water in your pot instead of pouring the water into the bag.
TIP: Vacuum seal the food in your resupply bucket to delay spoilage, and add a desiccant to keep opened Mountain House food fresh.


Malt-O-Meal mixed with powdered milk and Instant Breakfast is one of the densest breakfast foods you can pack, fits in just about any space, and is tasty enough to eat quickly. Oatmeal is a backpacking classic and a good choice but takes up slightly more space per calorie. Personally, I prefer high-protein granola with powdered milk and Instant Breakfast mixed in because it requires no cooking and can still be squished into small spaces. This way I don’t have to use my stove in the morning, which saves time and fuel.

Clif Bars and Honey Stinger Waffles are my staples, although the Stinger Waffles are pure carbs so I usually save them for when I need a quick boost in energy, such as when I’m heading up a pass. Flavored roasted almonds are great to snack on (wasabi FTW), and beef jerky can be a real treat when you stop for breaks on the passes. Trail mix is a great snack, but it’s a good idea to supplement it with other foods. Another incredibly calorie-dense food is peanut butter mixed with Nutella in a squeeze tube—it’s basically homemade chocolate Goo.
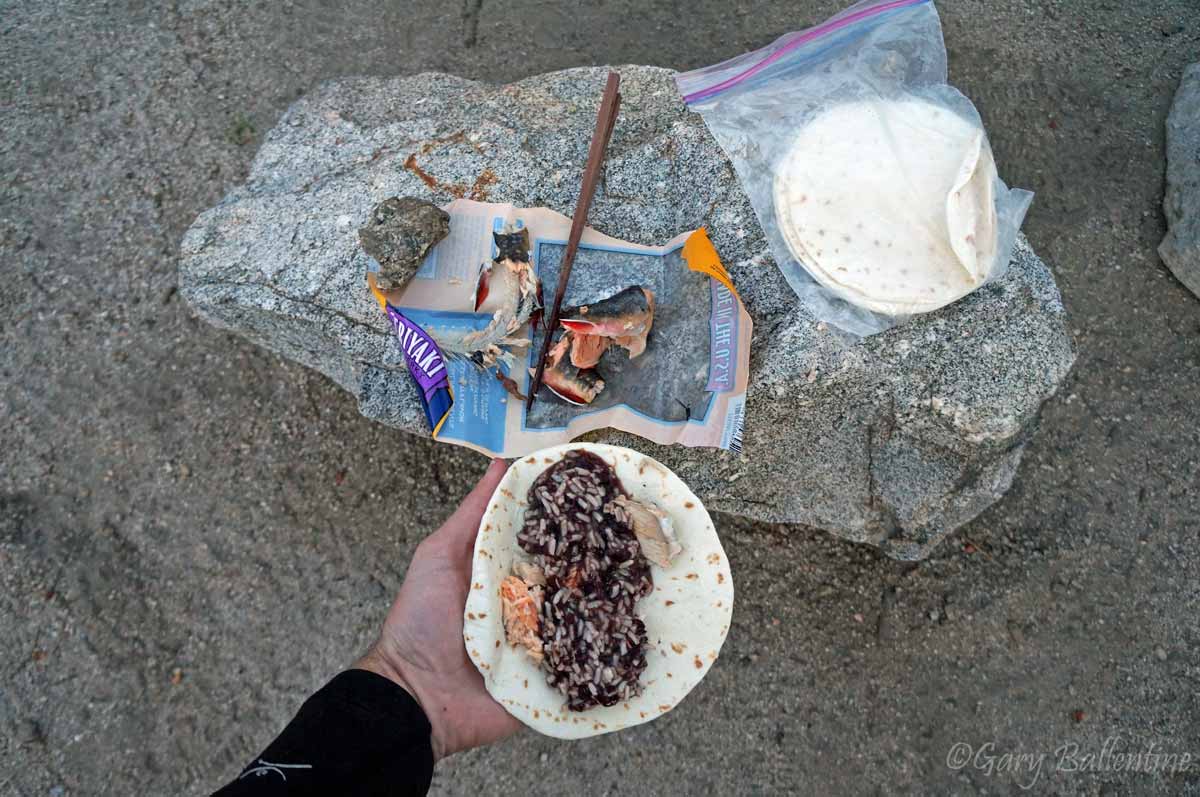
TIP: If you want an actual meal for lunch, Minute Rice mixed with pre-cooked refried beans can be readily cold-cooked in a Ziploc bag while hiking. Just add some taco seasoning!
Favorite Clif Bars: Nuts and Seeds, Peanut Butter Banana Dark Chocolate, Blueberry Crisp, Berry Pomegranate Chia

It’s a good idea to plan at least one substantial meal per day, and dinner is when you are going to be the hungriest. I buy #10 cans of Mountain House meals when I can find them and divide the contents into Ziploc bags along with a tiny desiccant pack, giving myself about 2-3 servings per meal. After I get the water boiling in my MSR Kettle, I just add the Mountain House to the kettle and let it sit for 20 minutes with the lid on and the stove off. I follow this up with a protein shake made from protein powder and powdered milk, and if I have time, I relax with a cup of pine needle tea and watch the sunset.
TIP: All species of pine are suitable for making pine needle tea. It’s high in vitamin C and tastes like Christmas! Just add a small handful to a pot of boiling water and steep for 5-10 minutes.
Favorite Mountain House Meals: Chili Mac, Lasagna with Meat Sauce, Spaghetti with Meat Sauce, Beef Stroganoff, Mac N Cheese

At each major resupply point (Vermillion Valley Resort, Muir Trail Ranch) there are 50 gallon barrels filled with extra food ditched by other hikers. It’s common for hikers to pack their resupply buckets to the brim, only to realize they either can’t fit it all in their bear can or they don’t want to carry that much food. This means that you will be able to sort through the excess for anything you might have forgotten to pack, didn’t pack enough of, or is just a tasty treat. I’ve seen generous hikers, known as ‘Trail Angels’, dump buckets of candy bars into the barrels!
Don’t rely on the barrels for anything, but do know they’re there if you need them! And if you’re feeling generous, pack some extra treats to add to the barrels. A simple Snickers bar out there can make someone’s day!

Hi! I’m Gary. I’m the mountain-enthusiast and gearhead behind Granite Cliffs. My goal is to provide the inspiration and information you need to go outside and explore. This is my Adventure Portal.